Search history
Trending now
Working on your very first pattern? read this article to find our best tips for new designers!
The tool icons can be found on the bottom menu on mobile or on the top left and right corners of the pattern when using a computer.
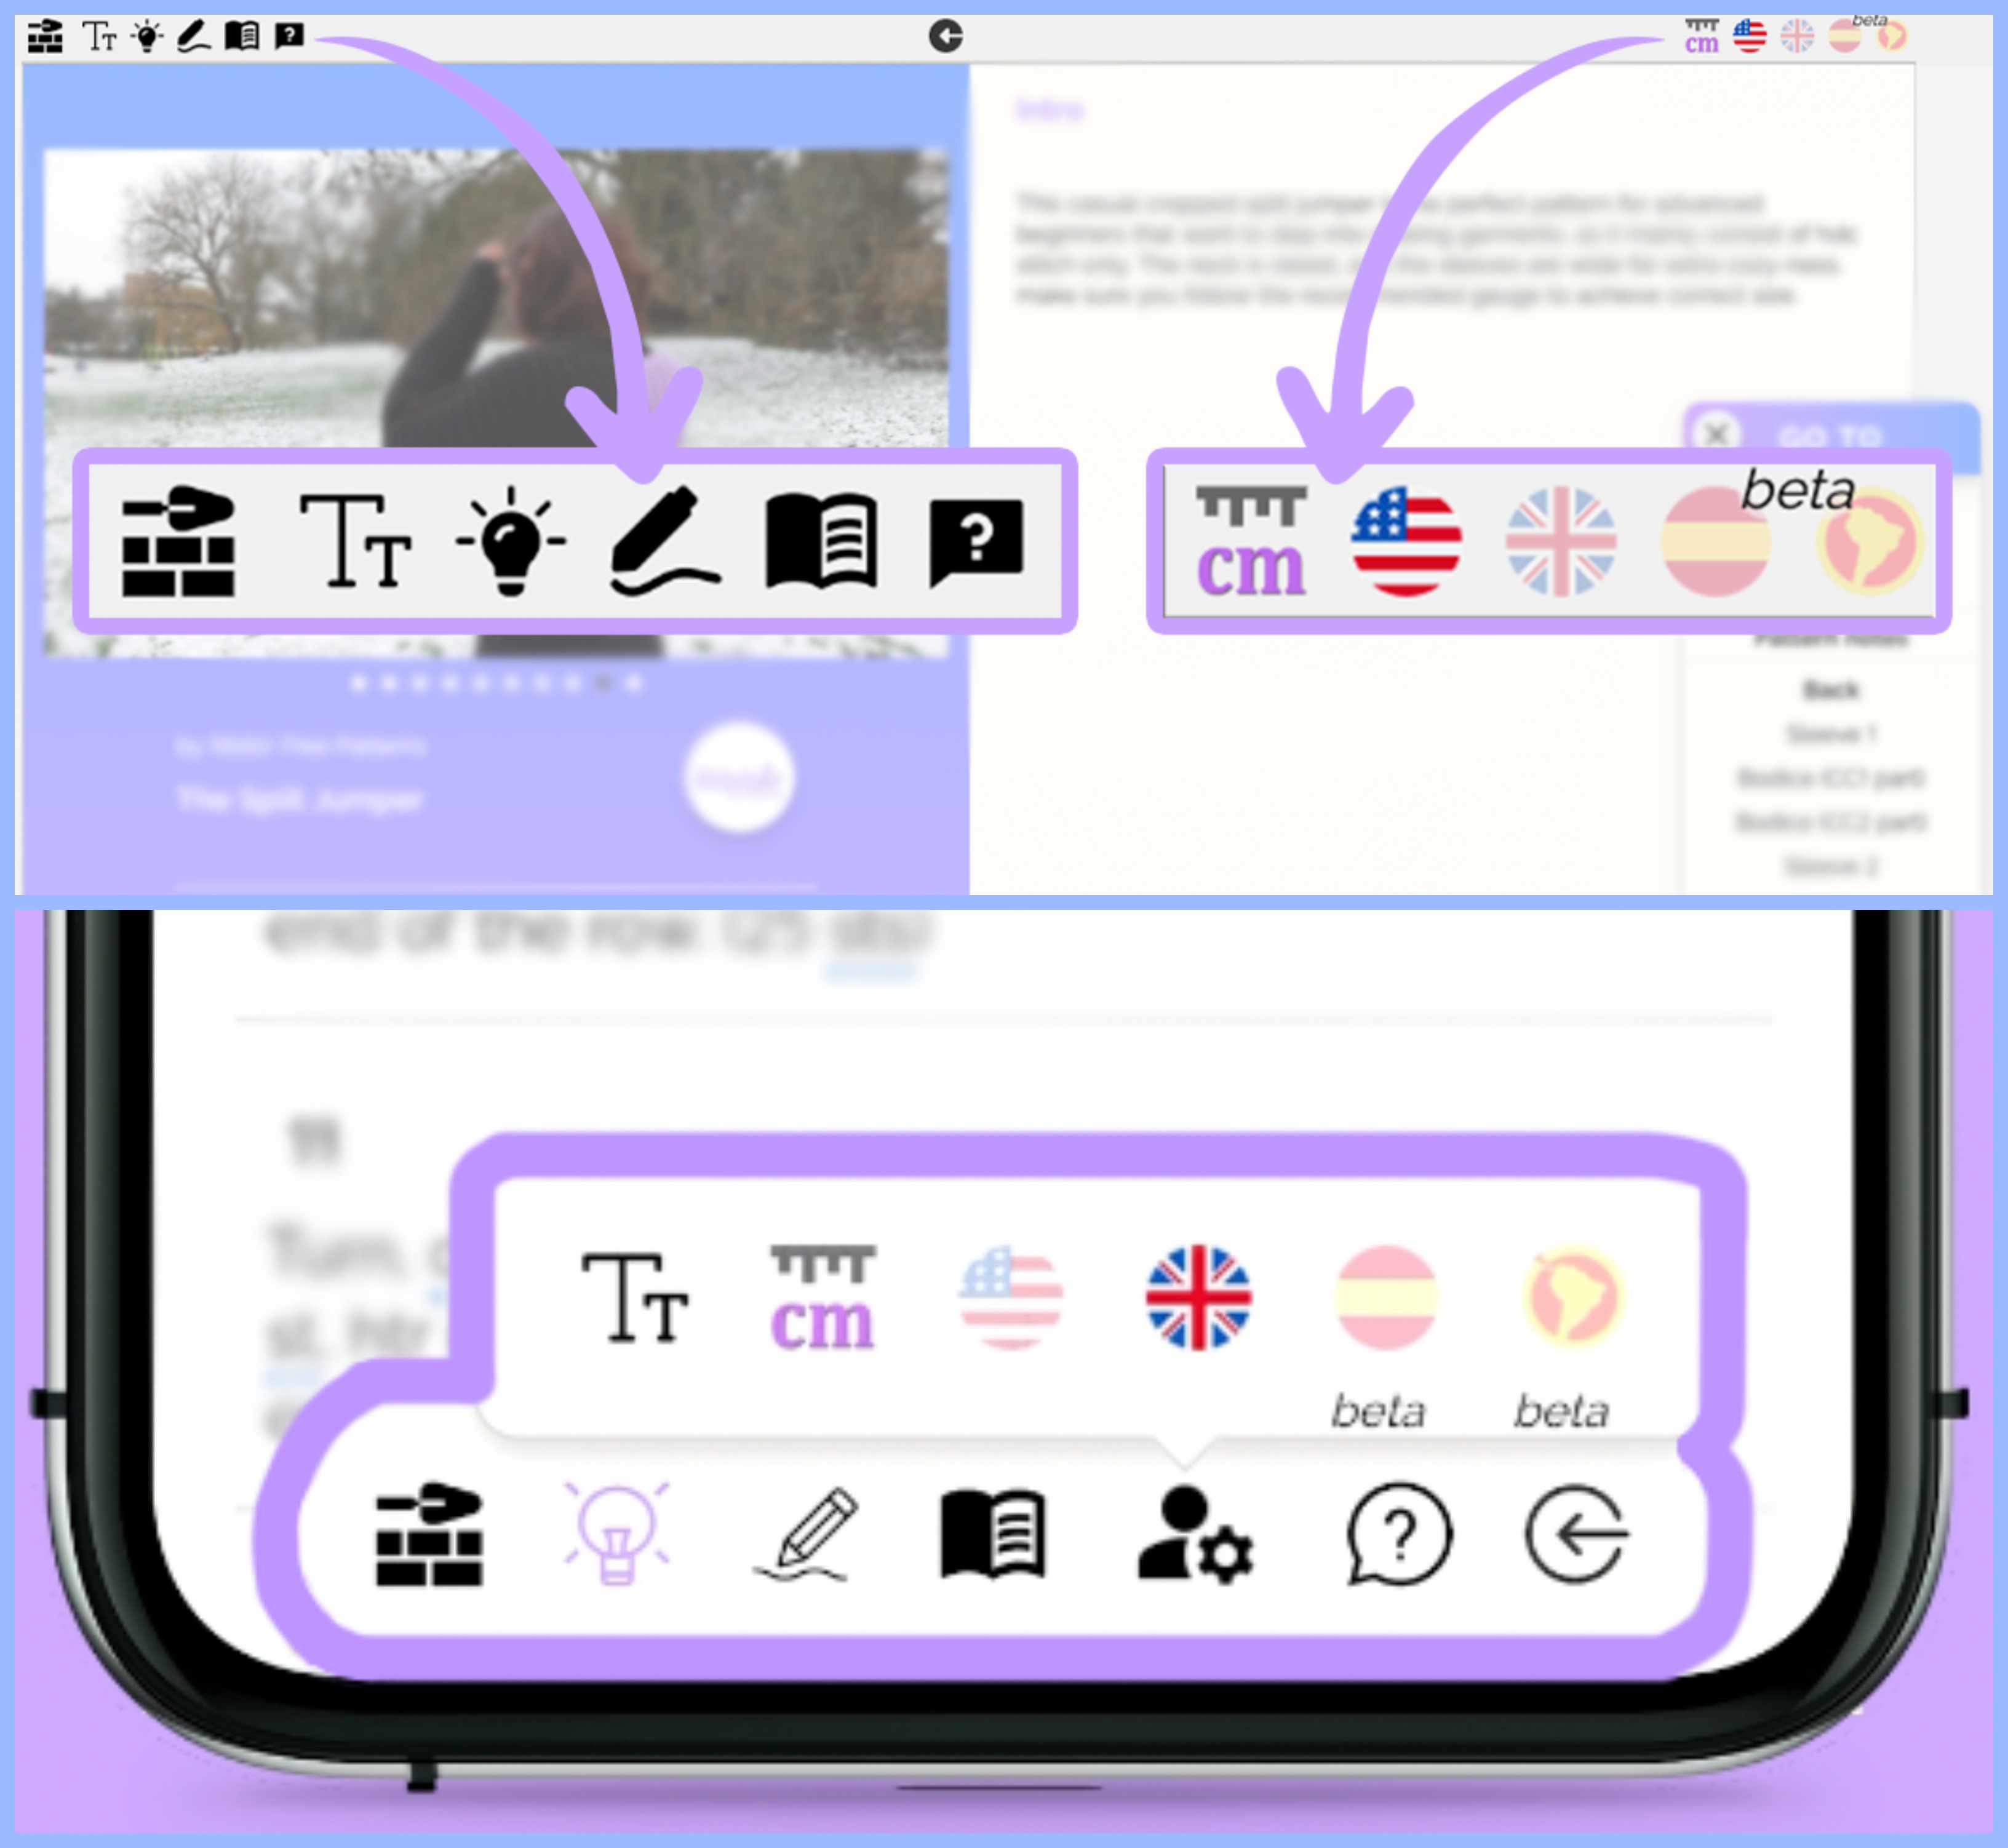
 Ribbuild mode
When switched on, you can edit your pattern. When switched off, you can view your pattern as a customer. Please note: You will not see the Ribbuild icon in a pattern that you didn’t design unless you are an authorized editor.
 Font size
Makes the text larger and increases line-spacing. The icon is located within the user prefernces menu on mobile.
 Tips (crafter mode only)
Choose if you want to see tips about stitches and abbreviations and watch instructional videos.
 Doodle (crafter mode only)
Doodle on the pattern. Please note: only you can see your doodles.
 Journal (crafter mode only)
Use the pattern journal to create and manage your projects. Add notes and pictures about your progress and any modifications you have made. Add a project name (this will apply to all your notes, unless changed), select your mood, add your journal note and picture, and save it. Set your notes to public to share them with fellow crafters and designers. Please note: only you can see your pattern journal, unless you choose to make your notes public.
 Help
HelpGet help with your pattern - go to help center, take tour again or visit Ribbuild guidelines.
 Find & replace
Use the find & replace tool to easily edit new or existing designs.
 Undo
UndoUse the undo button to go back and easily fix mistakes and errors.
 Redo
RedoUse the redo button to go forward and easily fix mistakes and errors.
 User preferences (crafter mode only)
Available on mobile only. Set your preferences - choose a language, a preferred measuring unit and font size.
 Exit pattern
Click here to exit and go back to Ribblr. Your changes will be saved automatically when you click the exit button.
Allows you to change between viewing patterns in inches or cm. Ribblr automatically converts measuring units for crafters so there's no need to add your pattern in both cm and inches. We even convert meters to yards and vice versa. The icon is located within the user prefernces menu on mobile.
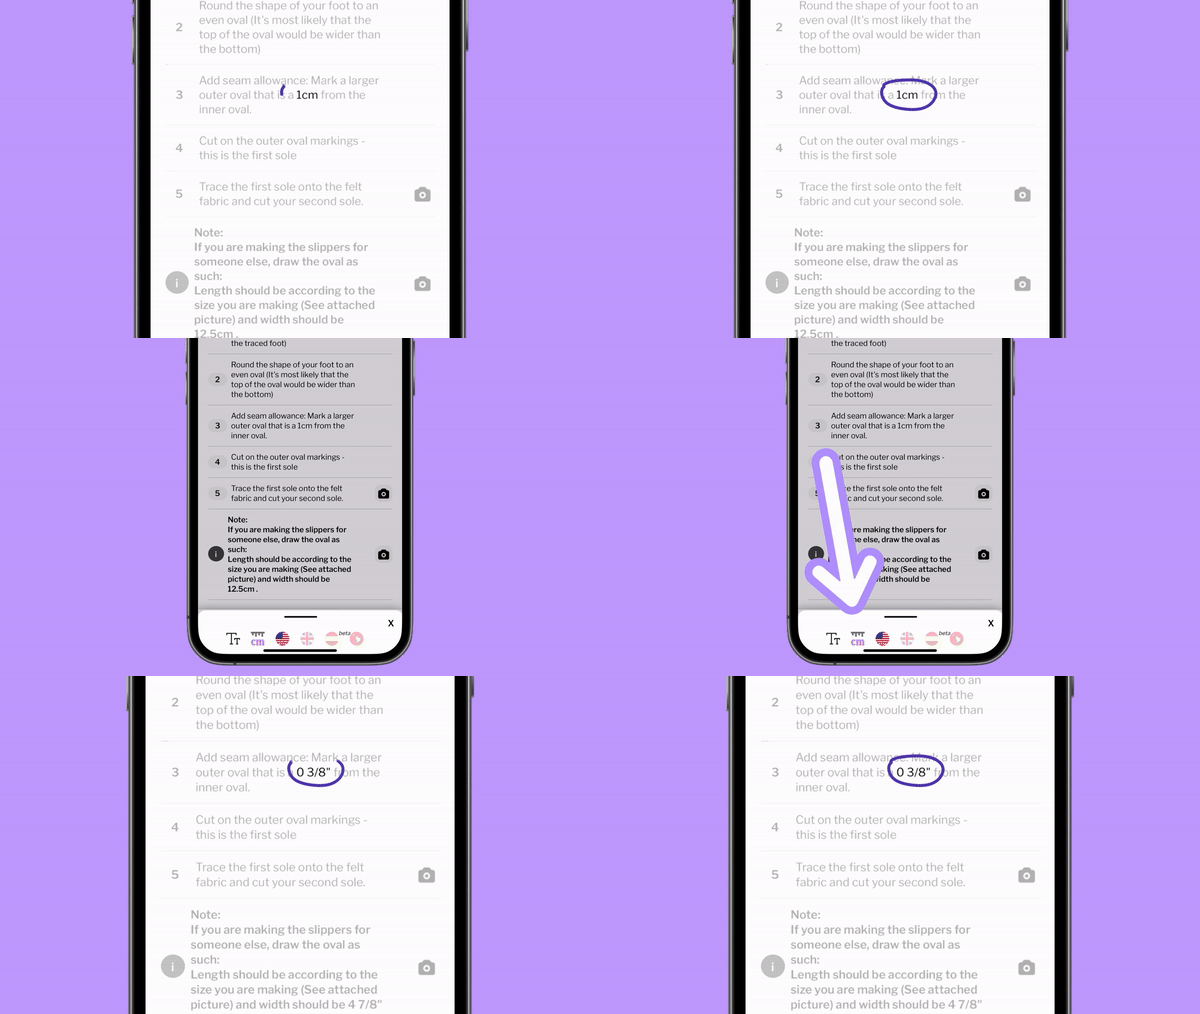
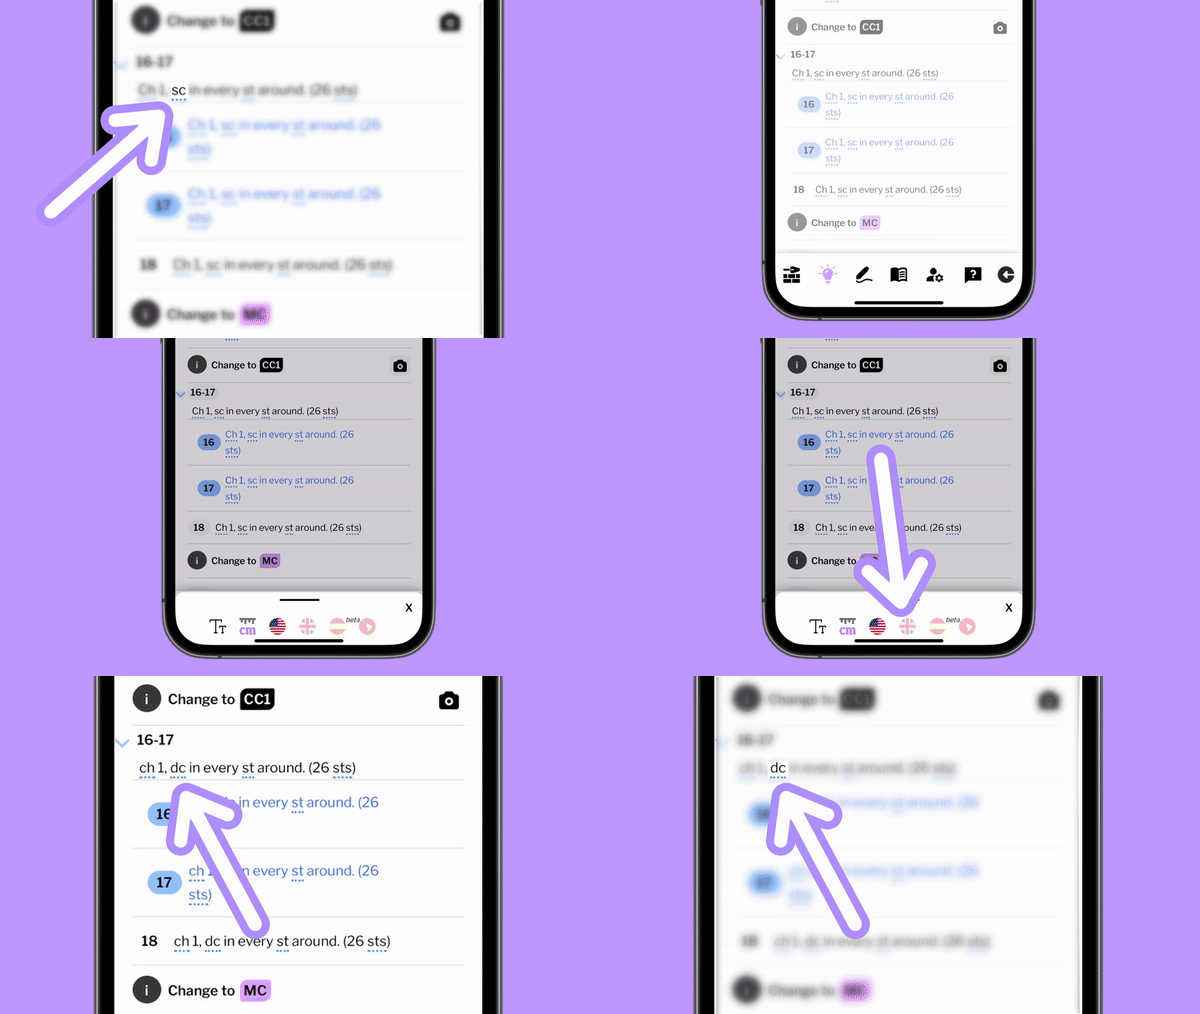
Change pattern's language. Ribblr automatically translates your patterns to all crafters, starting with English UK and US. Just upload your pattern in your native language and we'll do the rest. The icons are located within the user prefernces menu on mobile.
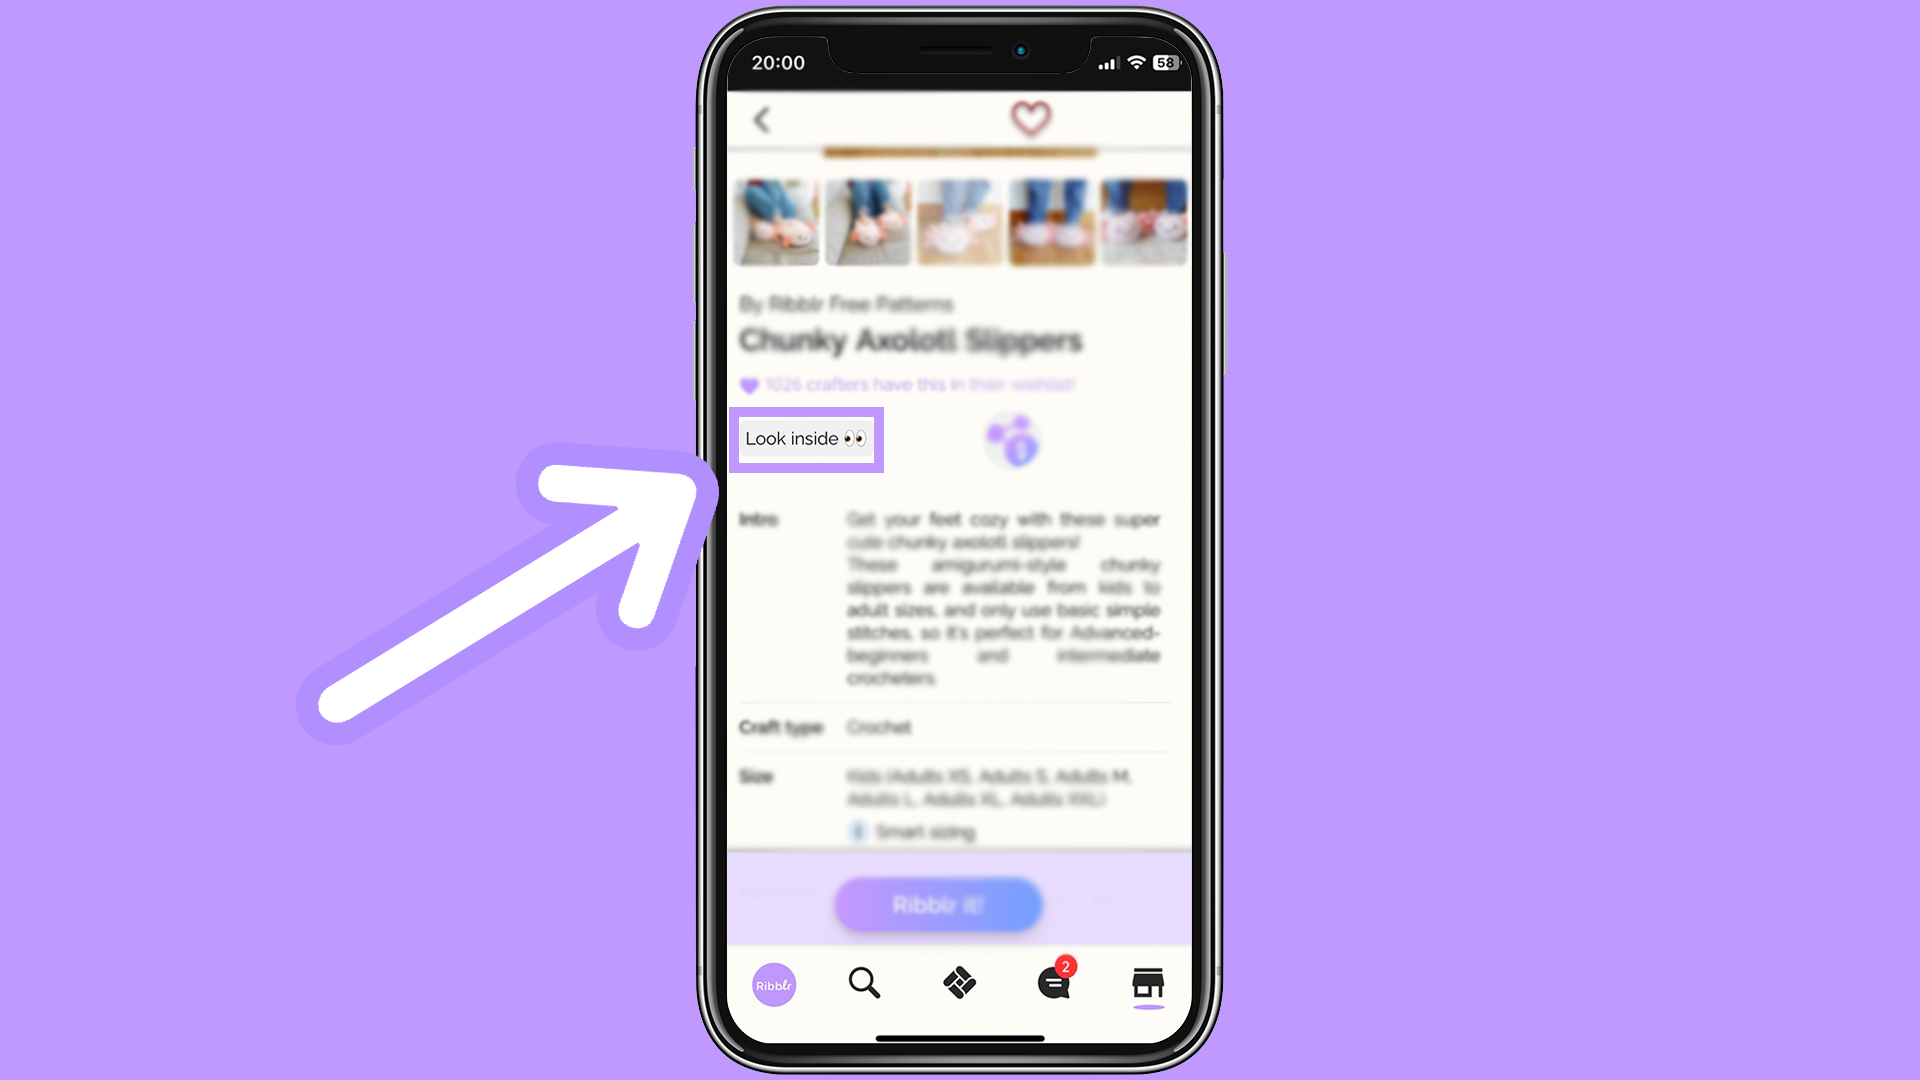
Please note: the information you enter on your cover, measurements, and materials sections is used to automatically create a listing and a product page for your pattern and is previewable by customers using the 'Preview ePattern' feature.
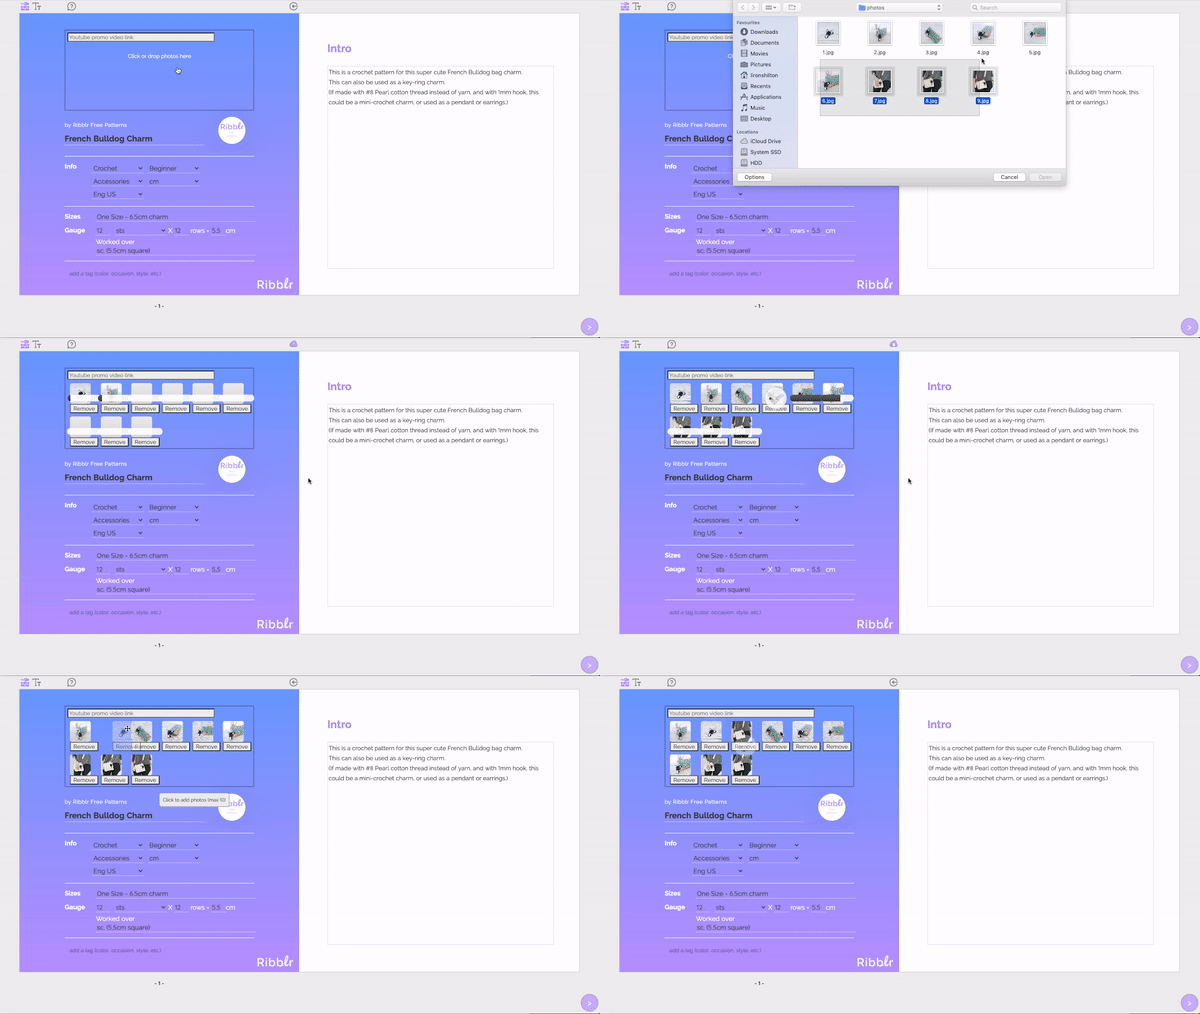
Either drag from folder or click to upload your selected photos. You can rearrange their order after uploading. By default the first photo will be the pattern's main photo. Please note: you can upload up to 10 photos.
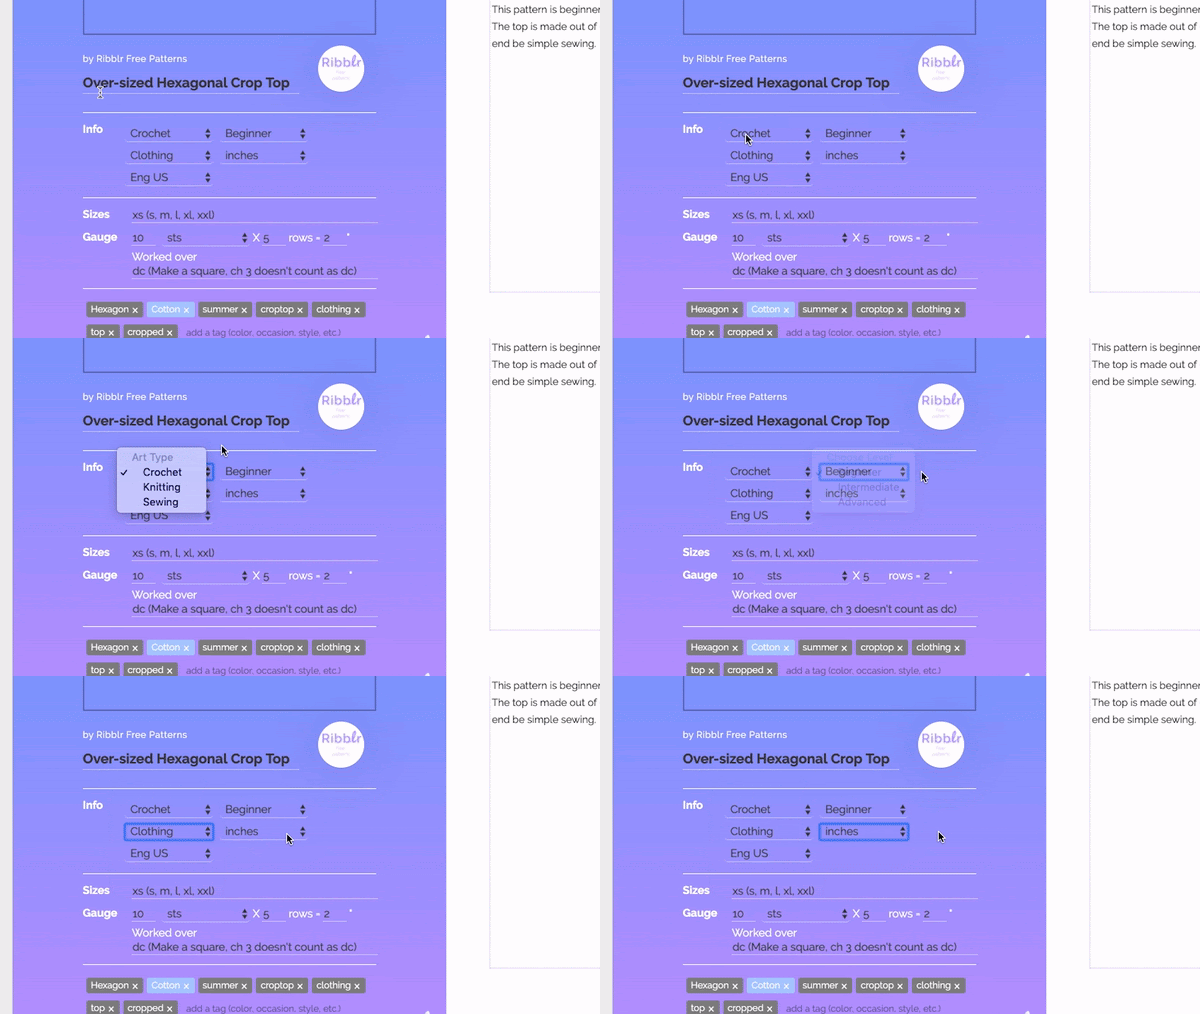
Add pattern name.
•Choose craft type •Choose pattern level •Choose category •Choose the measuring unit for this pattern (Ribblr will convert it automatically for you) •Choose the language you write your pattern in (Ribblr will translate it automatically for you)
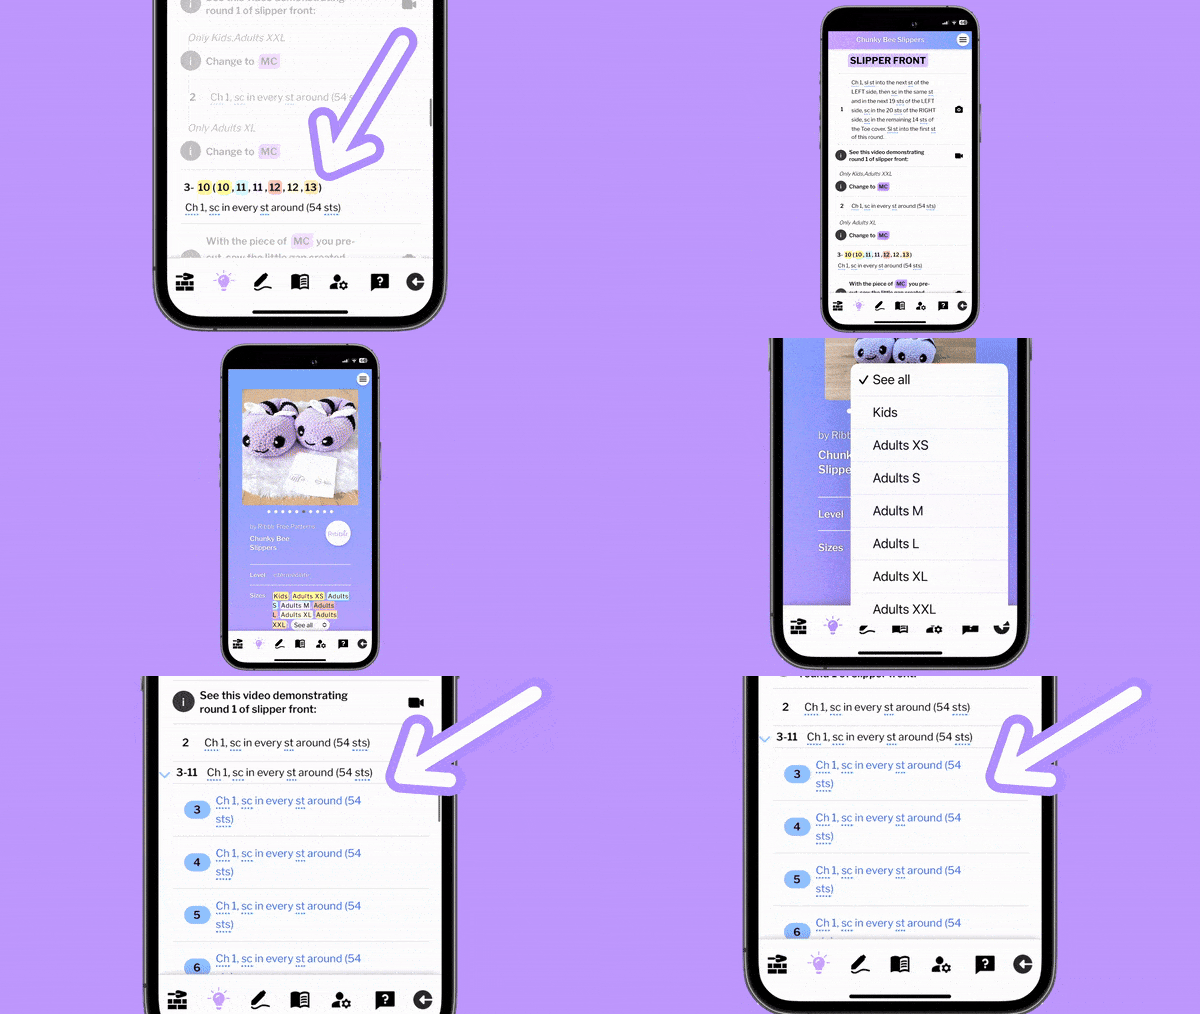
Write the pattern's available size(s). Important: If you have multiple sizes (3 or more) use one of these approved writing styles: • size1 (size2, size3, size4) • size1 (size2, size3)(size 4, size5) • size1 (size2) size3 (size4) By using one of these styles, you will enable smart sizing. Ribblr will automatically differentiate between the different sizes of your pattern, apply highlight color to each size and will also give the crafter an option to view their size only.
Add the gauge of your pattern. You can choose to write the gauge as sts x rows, number of rounds and number of pattern repeats. Add more information about the st you used in the 'worked over' section.

Add tags that best describe your pattern to help customers find them easily. Note: You can add up to 10 tags with a maximum of 15 characters each.

Write a short description of your pattern and mention any useful information of how to use the product, when to use it, who is it for or anything you'd like to say about the product.

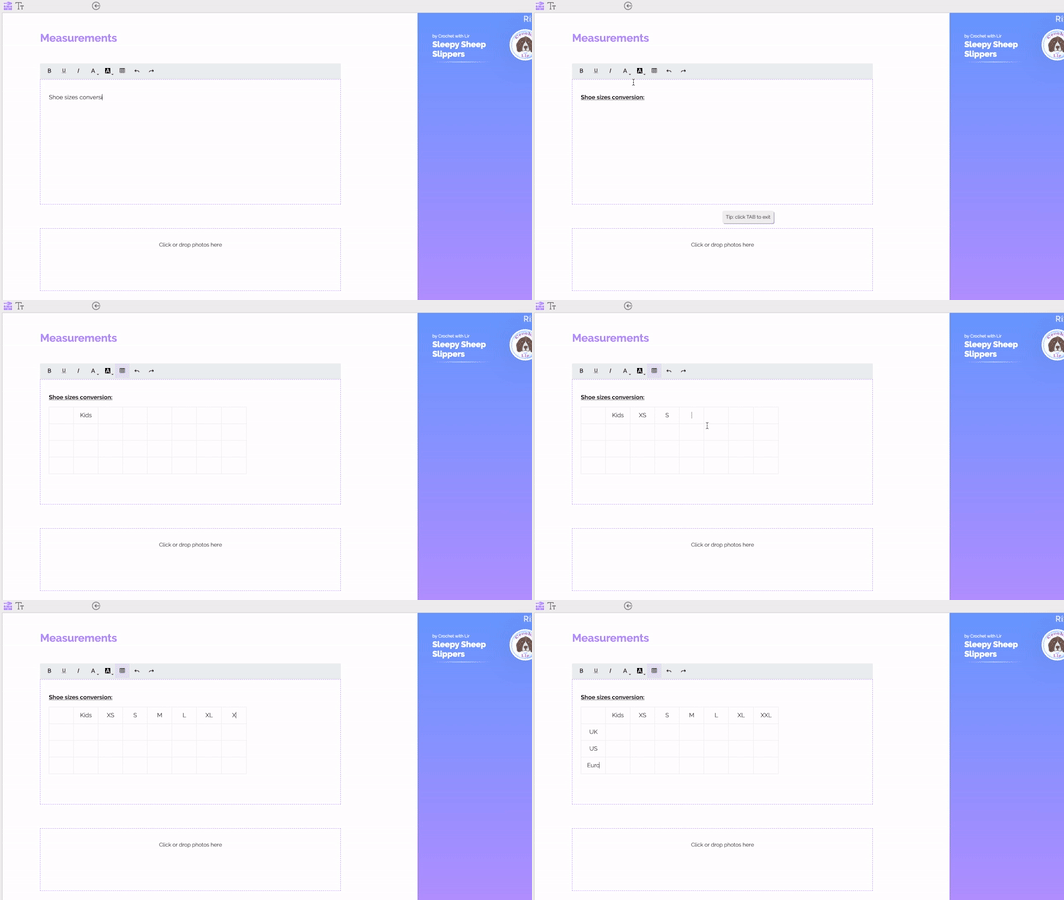
Add more information about your pattern's sizing in the text box. If applicable, describe the different measurements for each size, or the overall product dimensions. You can use the text editor to add a table, change font color and to make your text bold or underlined. You can also add up to 4 pictures to help customers understand your pattern's measurements or dimensions better. Do this by clicking the box or by dragging photos in directly.
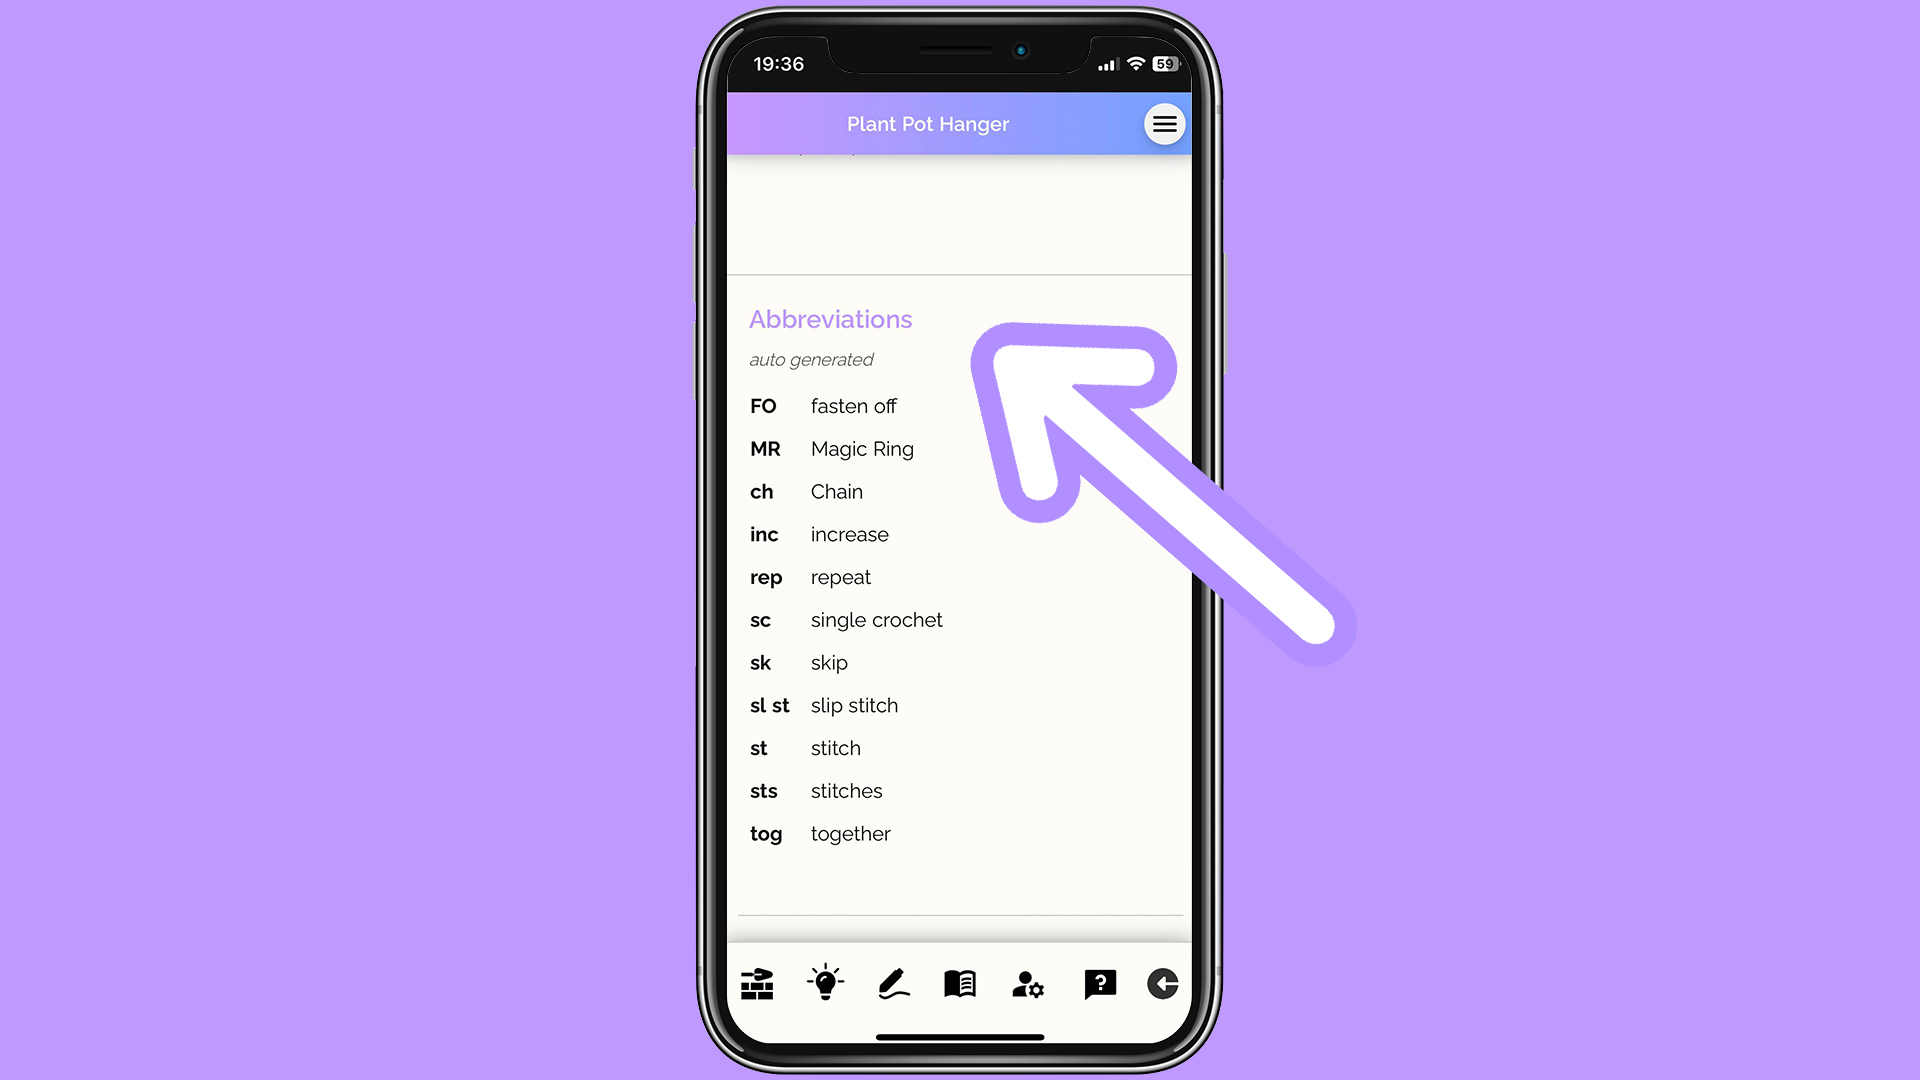
Ribblr automatically generates an abbreviations list from your pattern's instructions which is available to view once you turn Ribbuild mode off. Please add any special stitches in your pattern's instructions. The full list of abbreviations is available at the very top of the Crochet page, Knitting page and Sewing page. If you believe we left out an important abbreviation please get in touch.
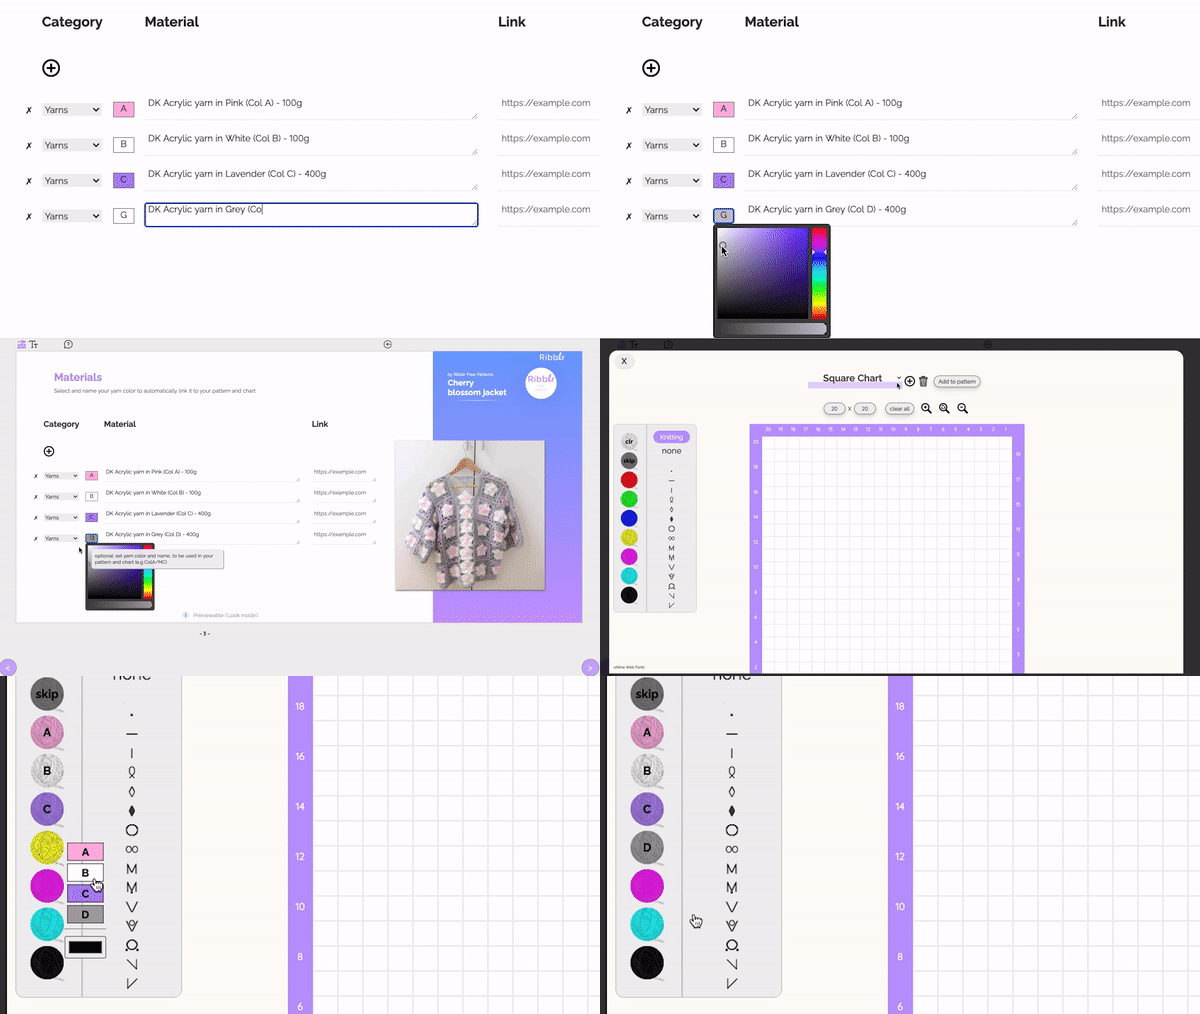
Press the + icon to add a material. 1. Category column: Choose your material’s category (Tools, Interfacing, Notions, Stabilisers, Fabrics, Needles, Hooks, Yarns, Other) 2. Material column: Add material description. For multiple sizes, use the same sizing writing style. For example: 200 (300, 400) grams. 3. Link column: Insert a link to buy the product mentioned (Optional) Press the x button to delete a material. When adding yarn, you'll be presented with two additional fields: - Yarn weight dropdown. Simply select the correct yarn weight. - Color box. We recommend that you set your yarn color and name so that we can automatically link it to your pattern's instructions and charts. Instructions with the same color name will automatically be colored throughout the pattern and interactive charts will automatically have your added yarn colors available to use. It will also let crafters who get your pattern create their own customized version of it and change the colors of the instructions and charts to match it to the yarn they are working with.

This section can not be previewed using the 'Preview ePattern' feature.
Please make sure you add all instructions in Ribblr's interactive and trackable format before publishing your pattern. Click each craft to find a list of all acceptable standard abbreviations: Crochet, Knitting, Tunisian, Sewing.
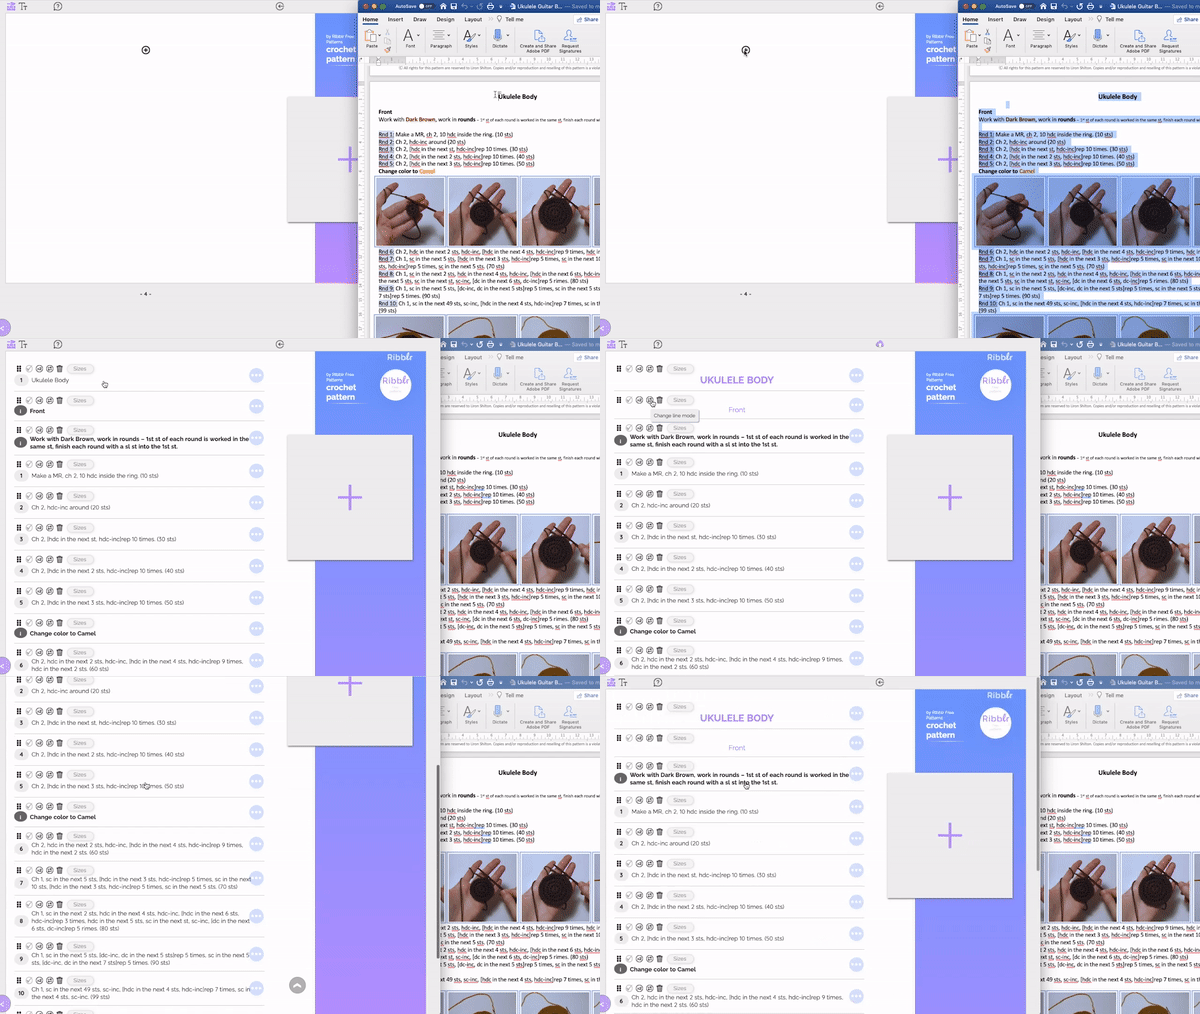
While Ribbuild is a powerful tool for creating new patterns, you can easily add an existing pattern too. Simply open your existing pattern, select multiple lines, and paste directly into Ribbuild. Ribbuild will automatically split, detect and apply formatting to your lines, including row/round numbers. Please note: you can copy your pattern directly from a PDF file, Word, Pages or a similar software.
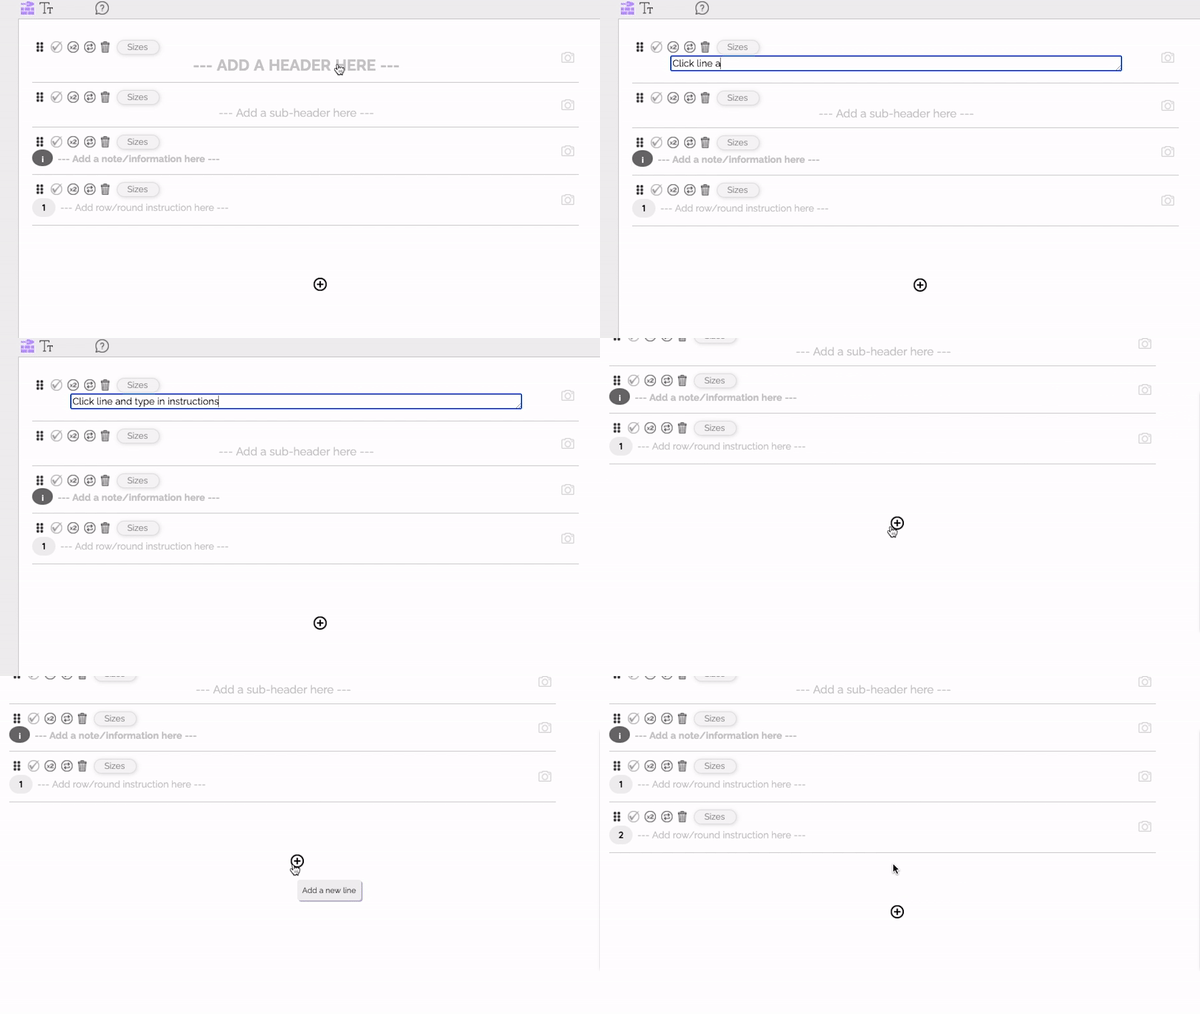
Add a new line to your pattern. You can also click the tab key on your keyboard to quickly add a new line.
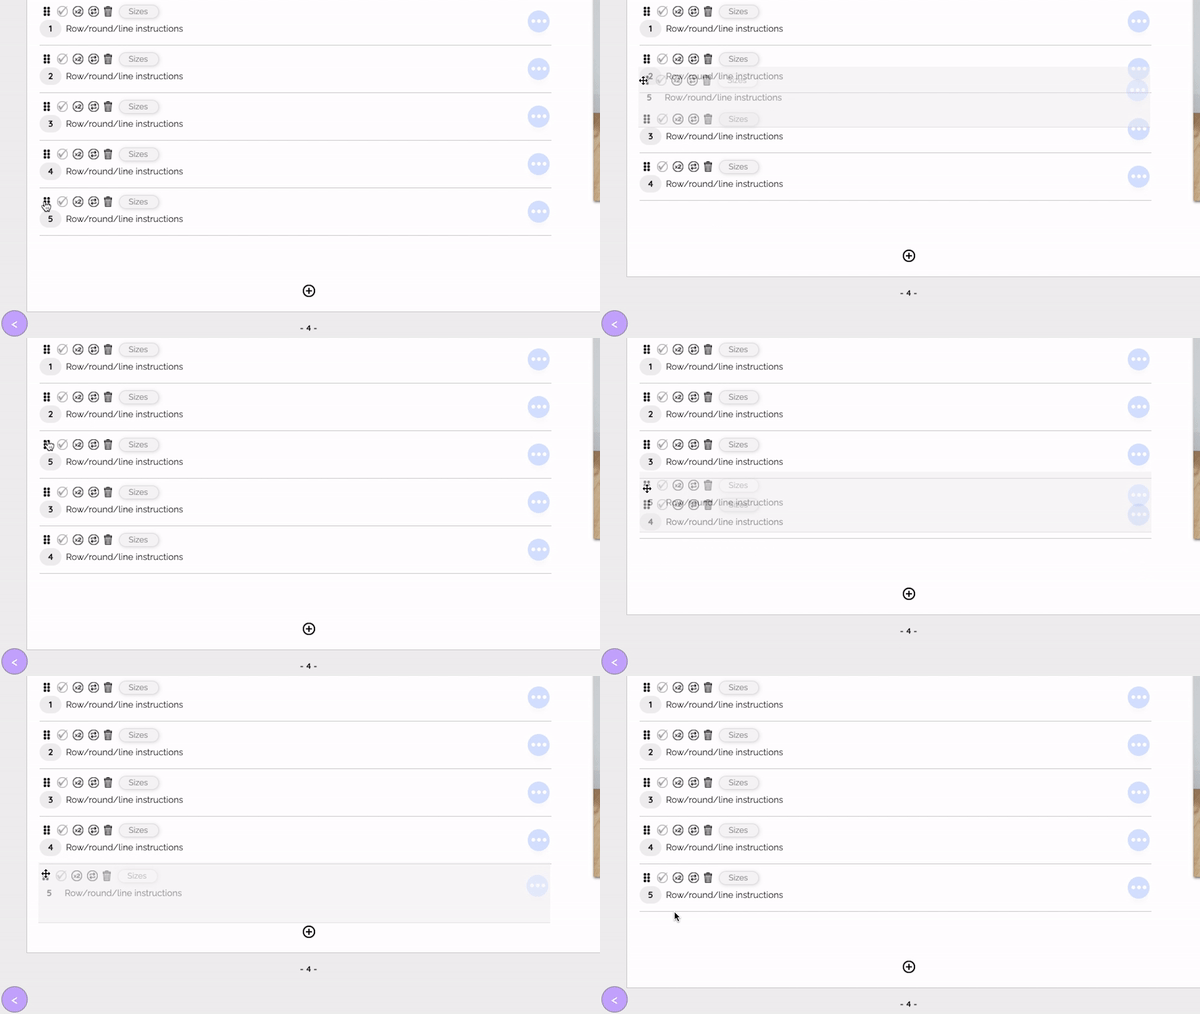
 Drag line
Click and hold a line to reposition it in your pattern. You can also select multiple lines to drag them at the same time.
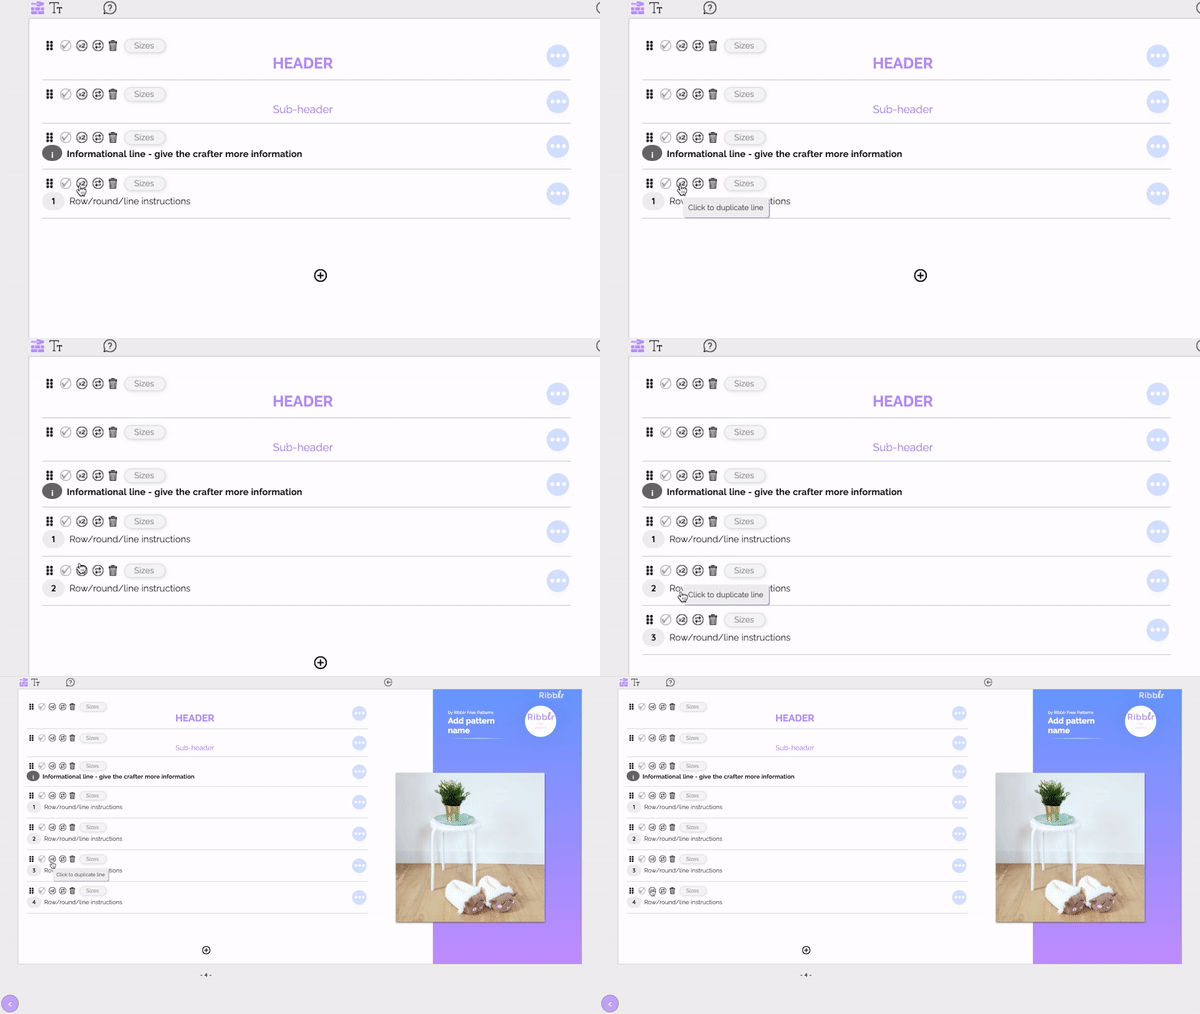
 Duplicate line
Click this to duplicate current line or add a new line in the middle of your pattern. If you wish to duplicate multiple lines please select them first. Please note: when you duplicate rnd/row the line numbers will grow accordingly.
 Change line mode
Changes the functionality of each line. You can even select multiple lines to change line mode for many lines at once.
You can choose the following line mode options:
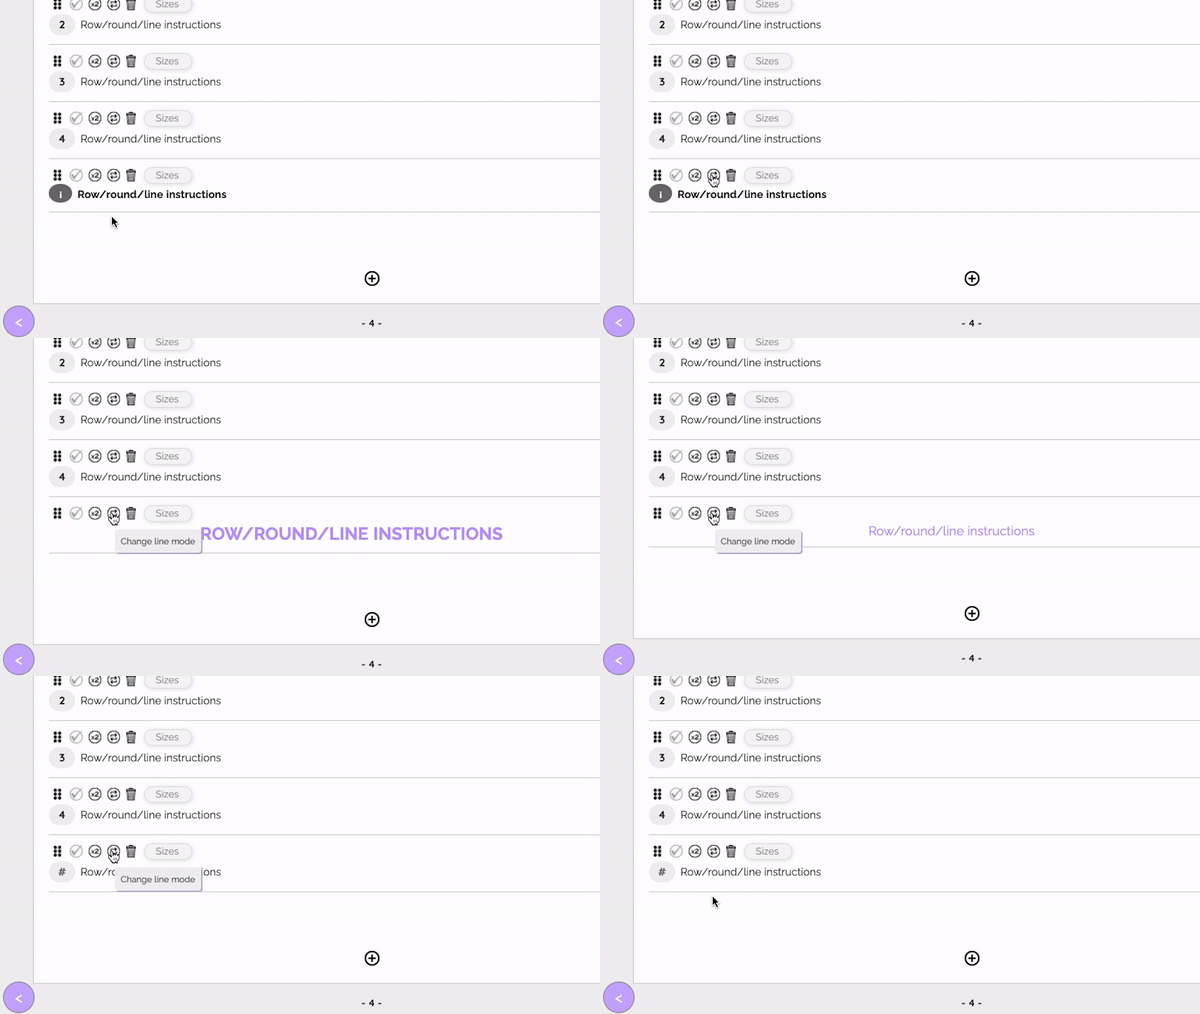 Section: A section can be used as header to describe the whole pattern or a large section with different compartments. The section mode is centered, colored and has large bold capital letters.
Sub-section: Use the sub-section line mode when you’re providing instructions for a small section of your pattern. The sub-section mode will be centered and colored.
Information: Use the information line mode to write detailed instructions or information. The information line will align to the left and the text will be black and bold.
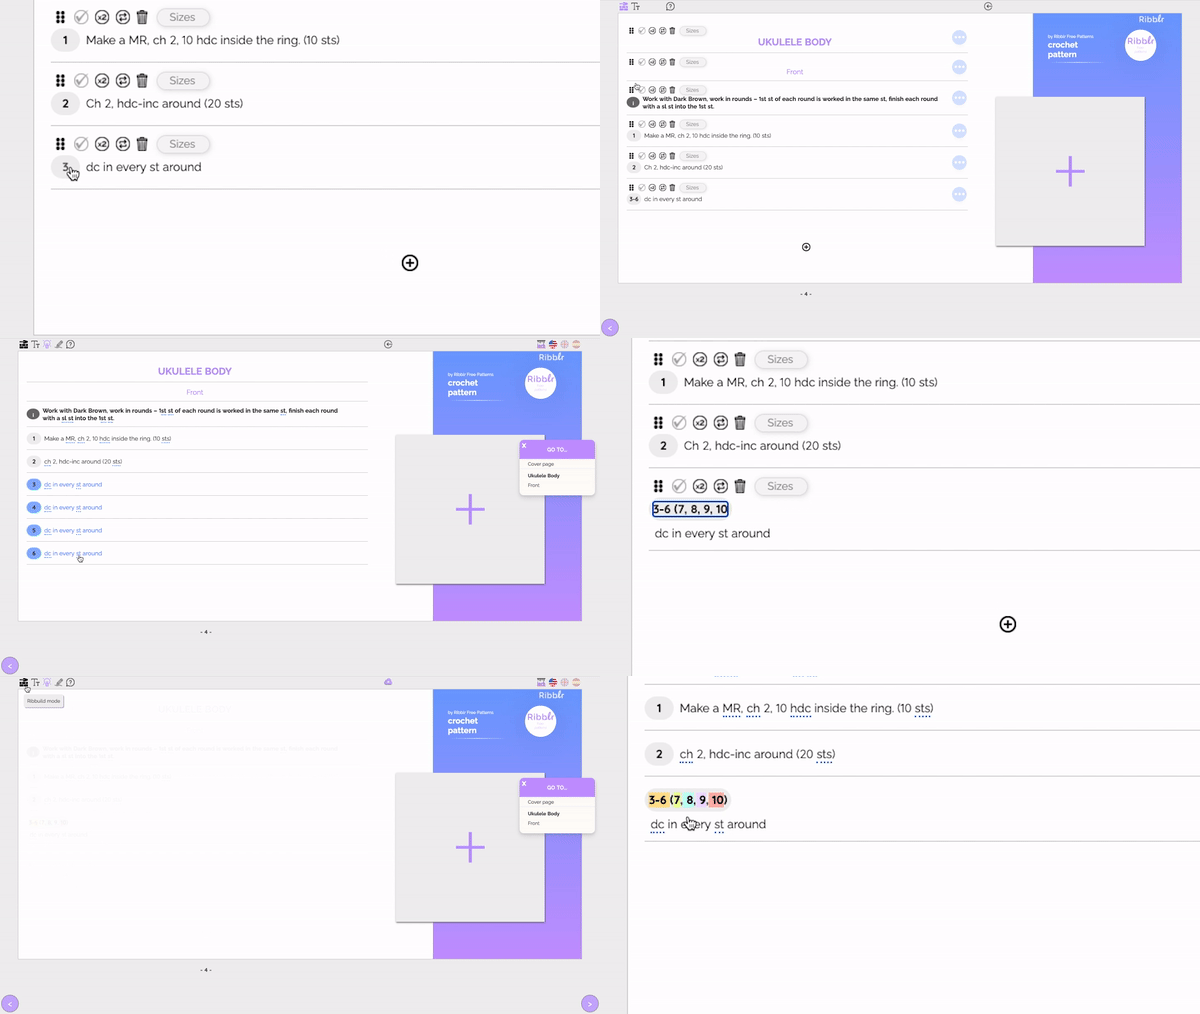
Round/Row line: Use the round/row line mode to add the pattern's instructions. You don’t need to write “rnd” or “row” at the beginning of each line. To the left of each line, you'll see a circle with # where you can add your rnd/row number. For repeated rows/rounds you can either duplicate the row/round or write X-X (for example 2-6 or even 2-6(7,8,9) for multiple sizes) inside the circle. This will automatically display all the lines for crafters so they can track the progress for each line. You may also leave it blank. This line mode will align to the left with thin black font.
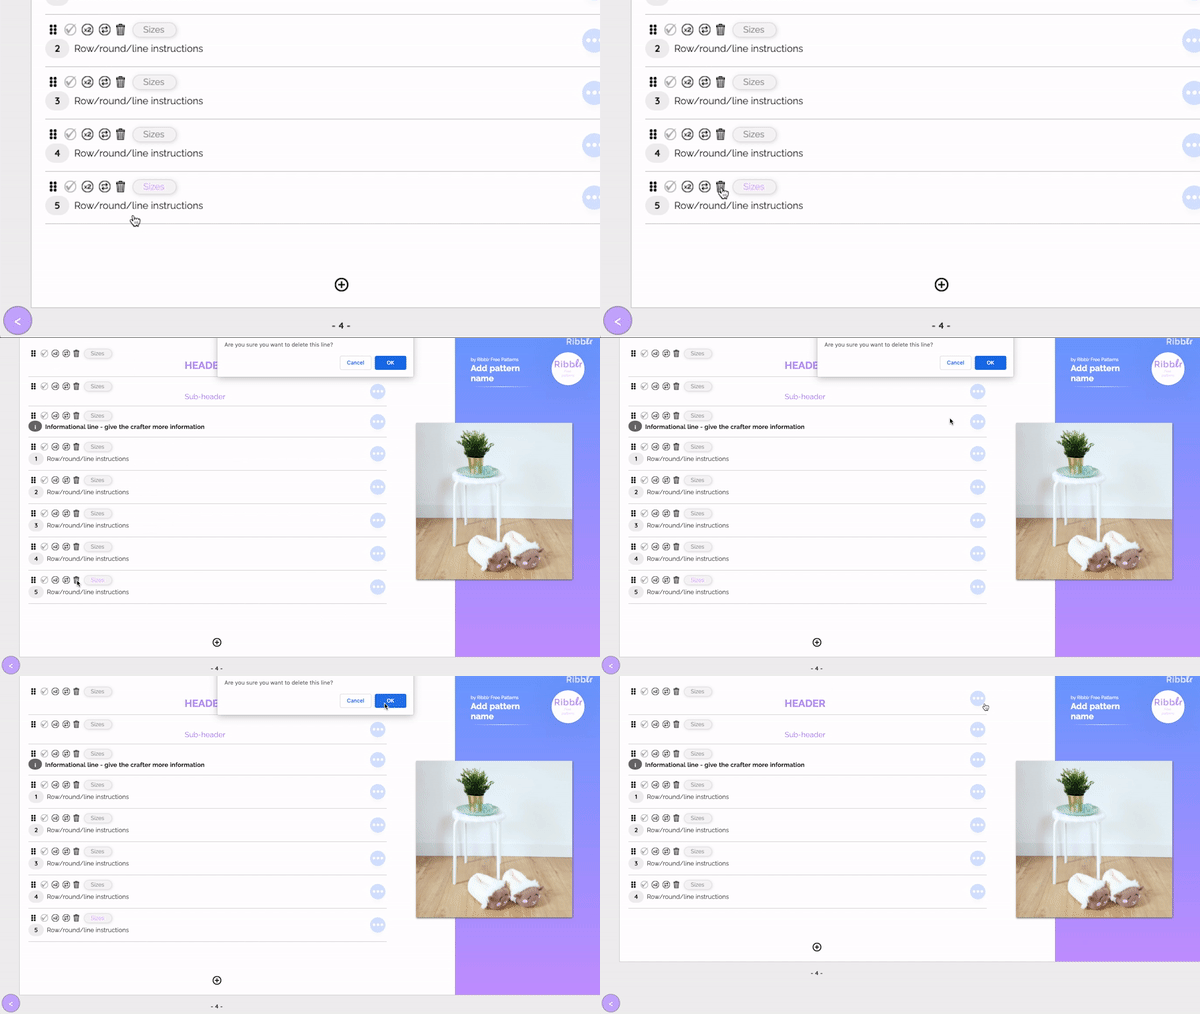
 Delete line
Click the trash/bin icon to delete a line in your pattern permanently. If you wish to delete multiple lines please select them first.
 Select line(s)
Click to select multiple lines. Once multiple lines are selected you can either duplicated them, merge them or delete them. You can also change the line mode of multiple lines at once by clicking the line mode icon. To deselect all lines use the right click or long click on mobile devices.
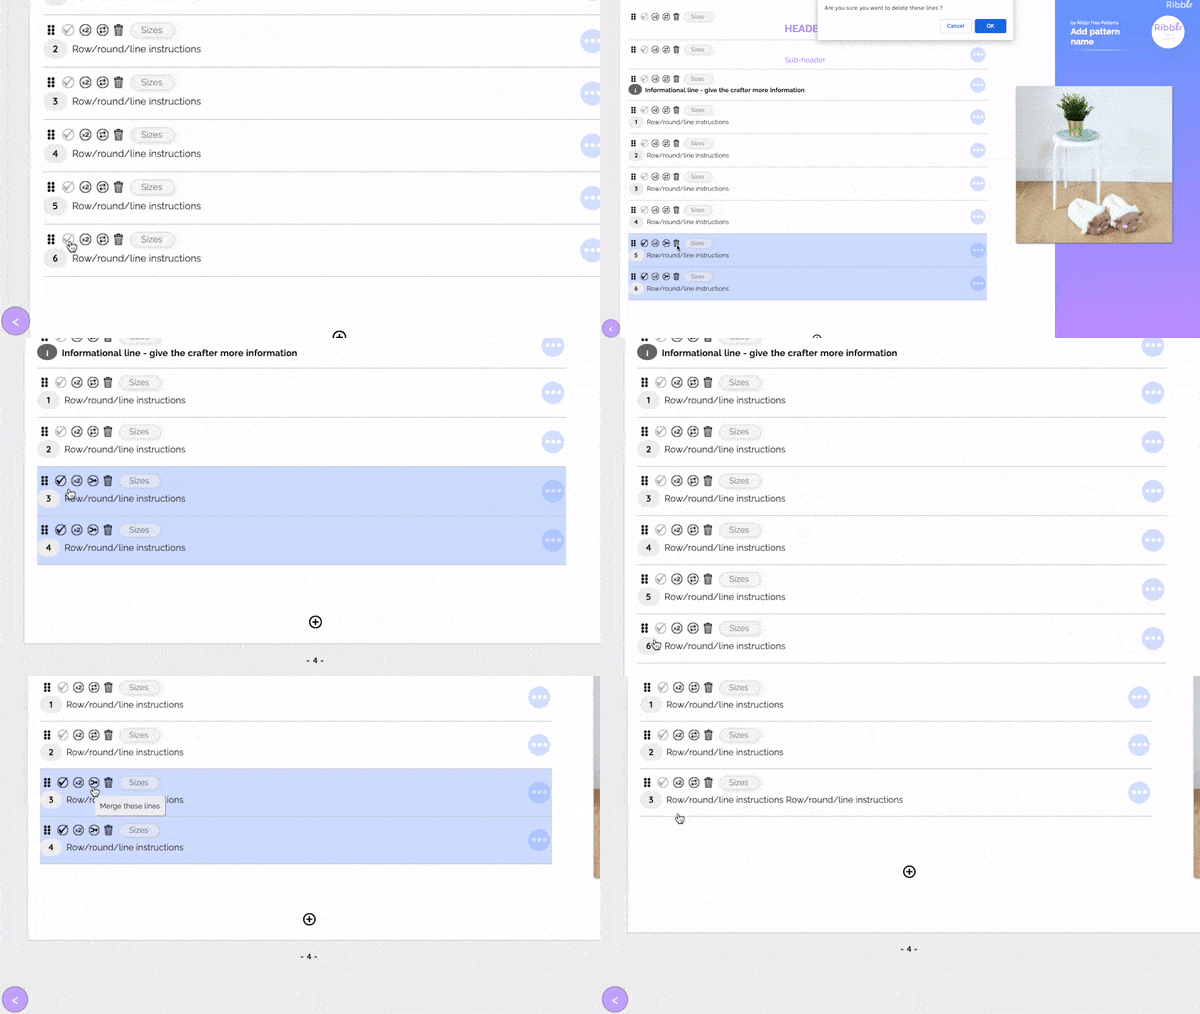
 Merge lines
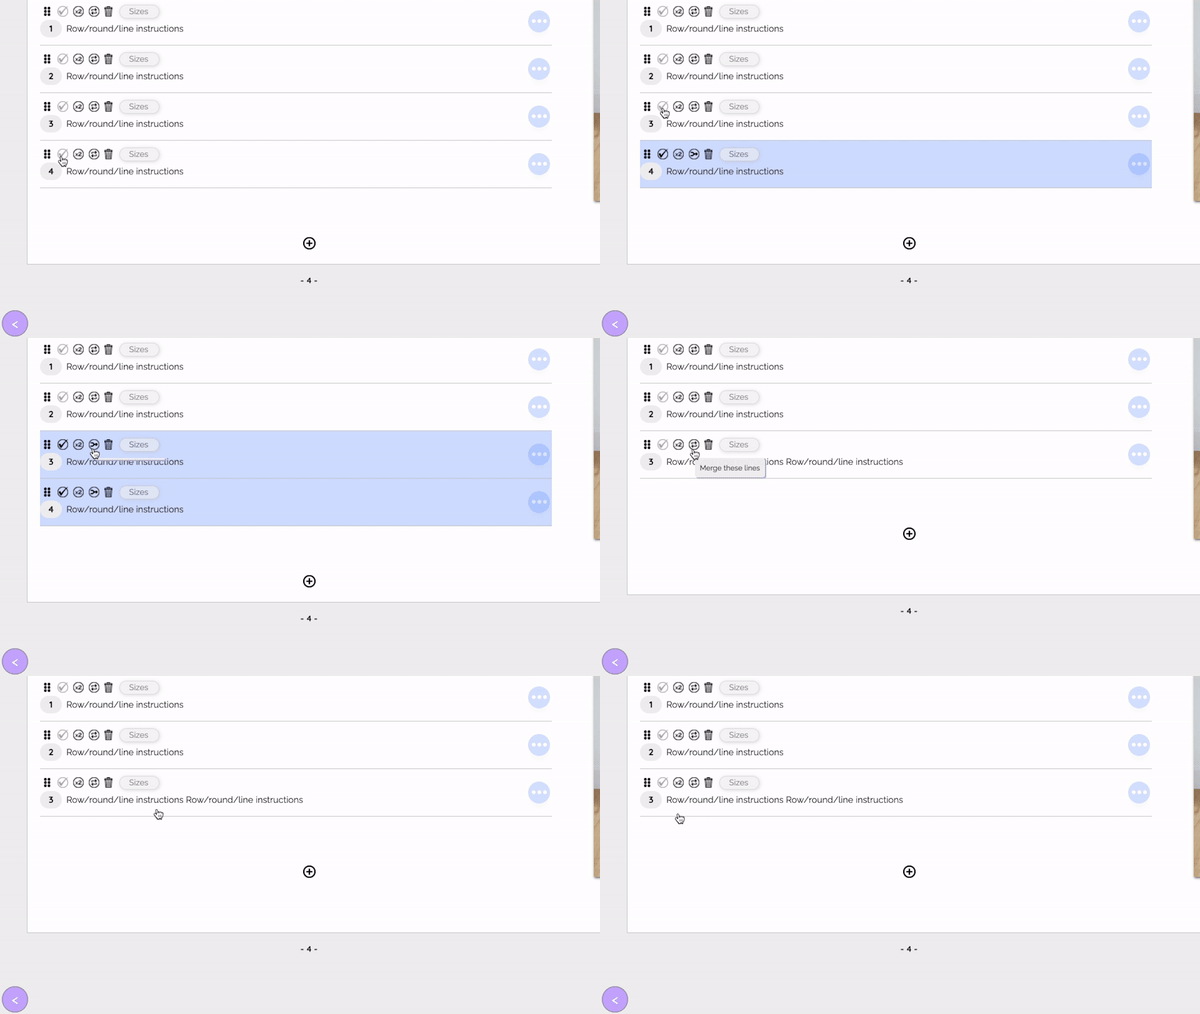
Select the lines you would like to merge and watch the merge icon appear. Click the merge icon to merge all selected lines.
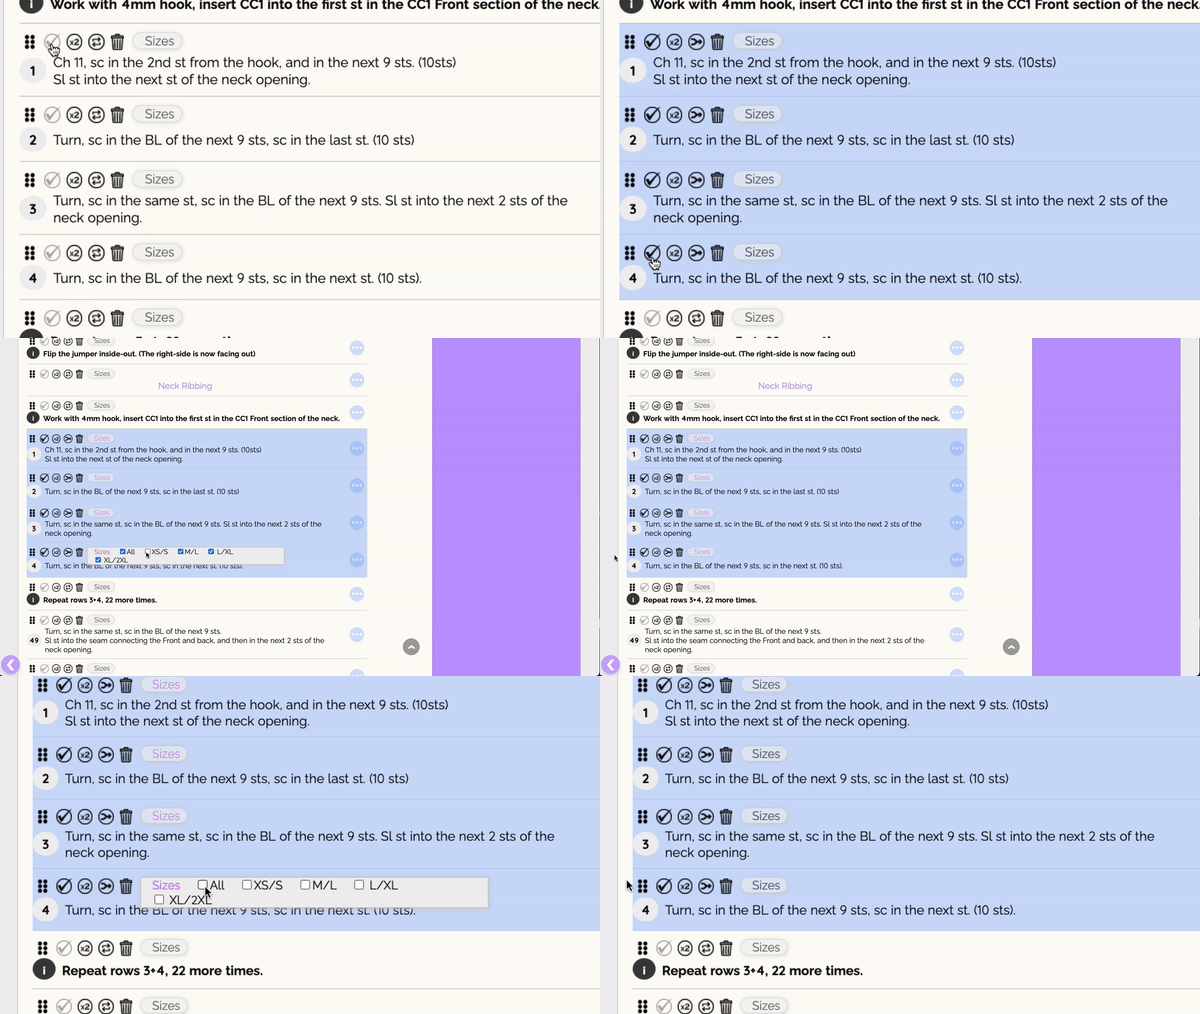
For a pattern with multiple sizes you will see the option to choose which sizes apply to which lines. By default, all sizes are selected. Tick or untick the applicable sizes for each line. Select multiple lines if you wish to apply the same sizing to many lines at once. Please note: the sizes you'll see here are the sizes entered in the pattern's cover page.
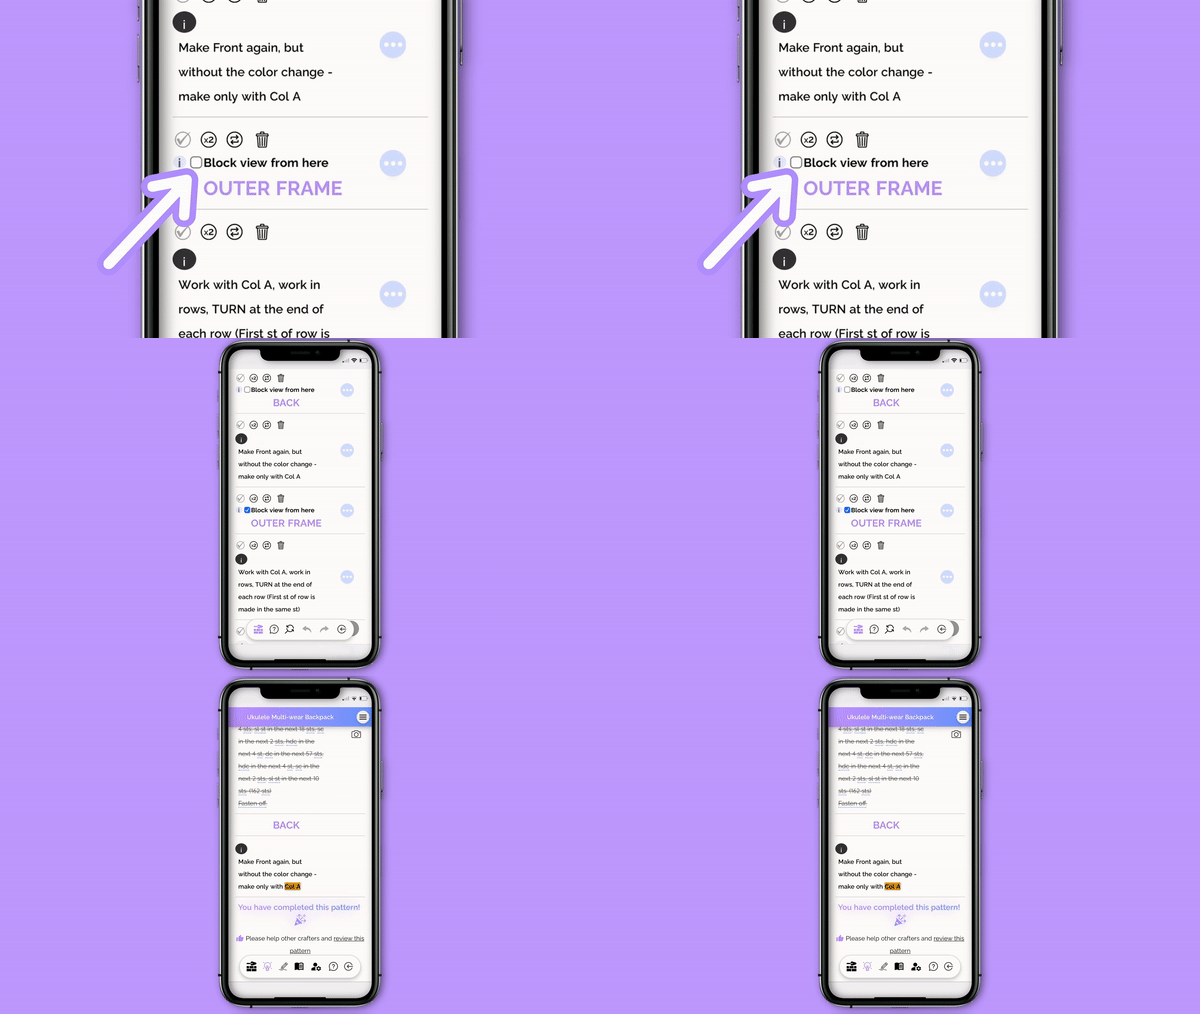
There is a checkbox next to each header or sub-header. Tick the box in order to block the view of the pattern from that point onward. This is particularly helpful for pattern tests and CALs. Please note: this feature is only available whilst the pattern is unpublished or in CAL mode.
Click this icon to upload a photo, video, file, paste a Youtube/Instagram/TikTok link, edit or add a chart or to make your attached media downloadable/printable. If your pasted Youtube link is showing an error, please make sure your video is set to public or unlisted on Youtube as private videos won't work. Secondly, please make sure you enabled the 'allow embedding' option on Youtube.
 Built-in charts
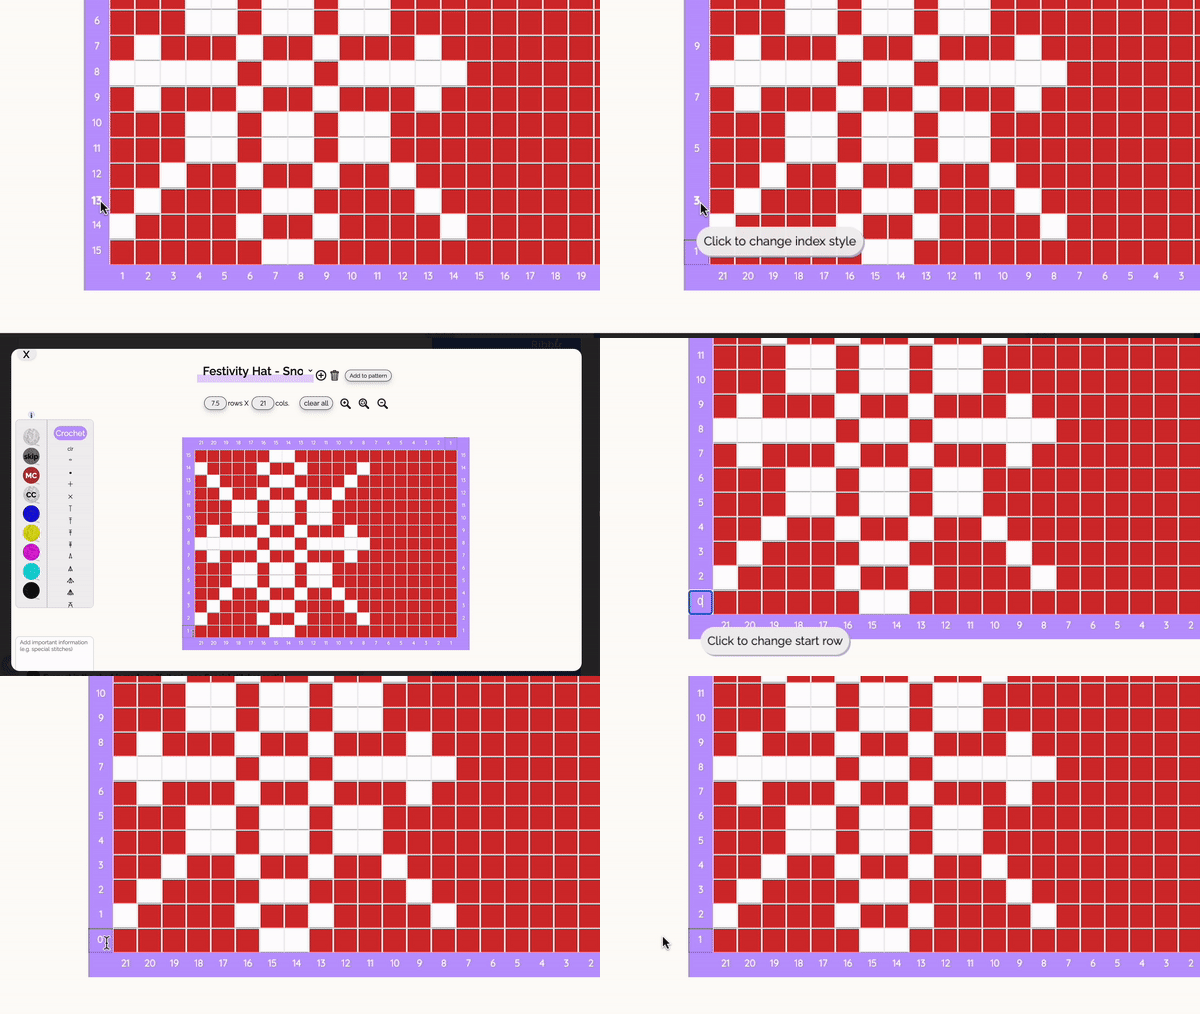
Click this icon to edit a built-in interactive chart. You can add different symbols and colors for Knitting, Crochet and Tunisian Crochet and you can also add a note for special stitches. You can build charts with up to 23,000 cells (i.e 150x150 or 300x75) and your progress is automatically saved. When you are done click 'Add to pattern' to attach the chosen chart to a line in your pattern. Click the first row/round to start the chart from a custom number. Click on any line number in your chart's frame to change the order. Click multiple times to see all options. We highly recommend that you first set your pattern's yarn colors and names in the materials list so we can link it to your chart. This will enable crafters who buy your pattern the ability to change any color of the chart and create their own customized version of it. You can also select colors for your charts by right clicking any of the colors to the left of the chart, however this will disable the ability for crafters to change the colors of your chart.

If you need help you can click the help icon where you can go to our help center, take the tour again, open this guideline or contact a member of Team Ribblr for further assistance!


 Connect with crafters worldwide
 Buy and sell patterns, yarn and more